Peru is part of the social studies curriculum so we made these canvases.
MATERIALS REQUIRED:
- pre primed canvas (on sale this week at Michael's in the 10 pack) or you can use a piece of cardboard
- acrylic paint
- art shirts or smocks to protect student's clothes from acrylic paint
- pieces of sponge
- pieces of corrugated cardboard
- drywall compound
- plain paper
- reference photos of Machu Picchu
- watercolor or tempura paints
- llama pictures
- text printed from computer, (PERU, INCA, or Machu Picchu)
- Aleene's Tacky glue
- scissors
- Mod Podge, optional
PROCEDURE:
Hand out some reference photos of Machu Picchu to the students.
Hand out canvas or cardboard substrate (background or base).
Hand out extra pieces of corrugated cardboard. Have the kids line up a corner of the cardboard with the canvas. Trace out a mountain ridge in pencil and then cut out of cardboard.
Place canvas aside.
Place a little drywall compound on a recycled plate.
Add some texture to the tops of the mountains. This is not to represent snow but to add that 3D texture to appear rocky.
Let dry, about 4 - 6 hrs.
Cut a piece of paper to fit into the bottom part of your cardboard mountain. Now Machu Picchu is a fairly complicated ruin for Grade 3 so I had them draw out a portion of the ruin on the paper.
Add some color to your design with watercolor or tempera disk.
Add some outlines with fine sharpie.
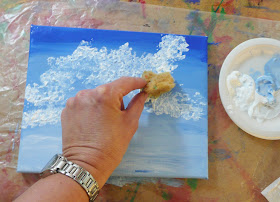 Put on those art shirts to protect your clothes from the acrylic paint. Paint your canvas with sky colors. Make sure to paint the sides as well as we won't be framing these. Add some clouds or mist with white paint and a sponge. Let dry.
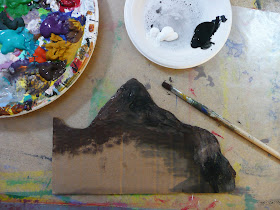 Paint your mountain. You don't need to paint the bottom section where your paper design of the Machu Picchu ruin will be . Let dry.
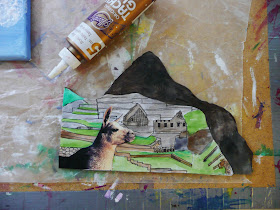
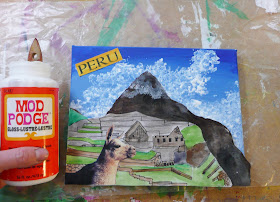
When I was researching this project it seemed like every time a tourist at Machuu Pichuu was trying to get a good picture of the site a llama would come up and stick their head into the shot, (probably looking for food), so I added this element. Find a picture of a llama, there are lots on the web, and cut out the shape. Glue the design of the ruin to the bottom part of your mountain and then glue your llama into place.
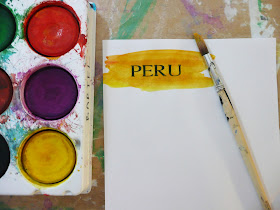 Glue the mountain piece onto the background with more tacky glue or a glue gun, (adults only). Now we need a title. You can either print off an assortment of titles for your students, have them do it during computer time, or have them free hand it. Paint the paper with watercolor or tempera disk to give it some color. Cut out and glue into place on your piece.
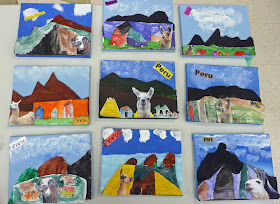 Here are some of the completed canvases that the Grade 3's made. (By the way Mrs. K at my home school, I plan on doing these when I get back!)
I'm planning a post of the completed student work for next time and I'm teaching pysanky like crazy over the next two weeks. (my hands are already multi colored from all the egg dying!). See you soon.



SO excited about this project! I am in a rock unit right now for science and have been wanting to make one of your cool project folders. I have been trying to think of some cover art and low and behold here is a mountain! Perfect! Off to Lowes to buy joint compound!
ReplyDeleteThis is so inspiring and creative! I can't wait to get supplies and do this with my girls!
ReplyDeletenice paintings:)
ReplyDeletevirtual worlds for kids
These are stunning- love all the mixed media and the llama in the front is just too funny! Can't wait for the pysanky post- I grew up making them in a town full of Ukrainians so I love seeing your posts about them!
ReplyDelete